RHEL 6.X 更换主板后网卡识别失败处理方法
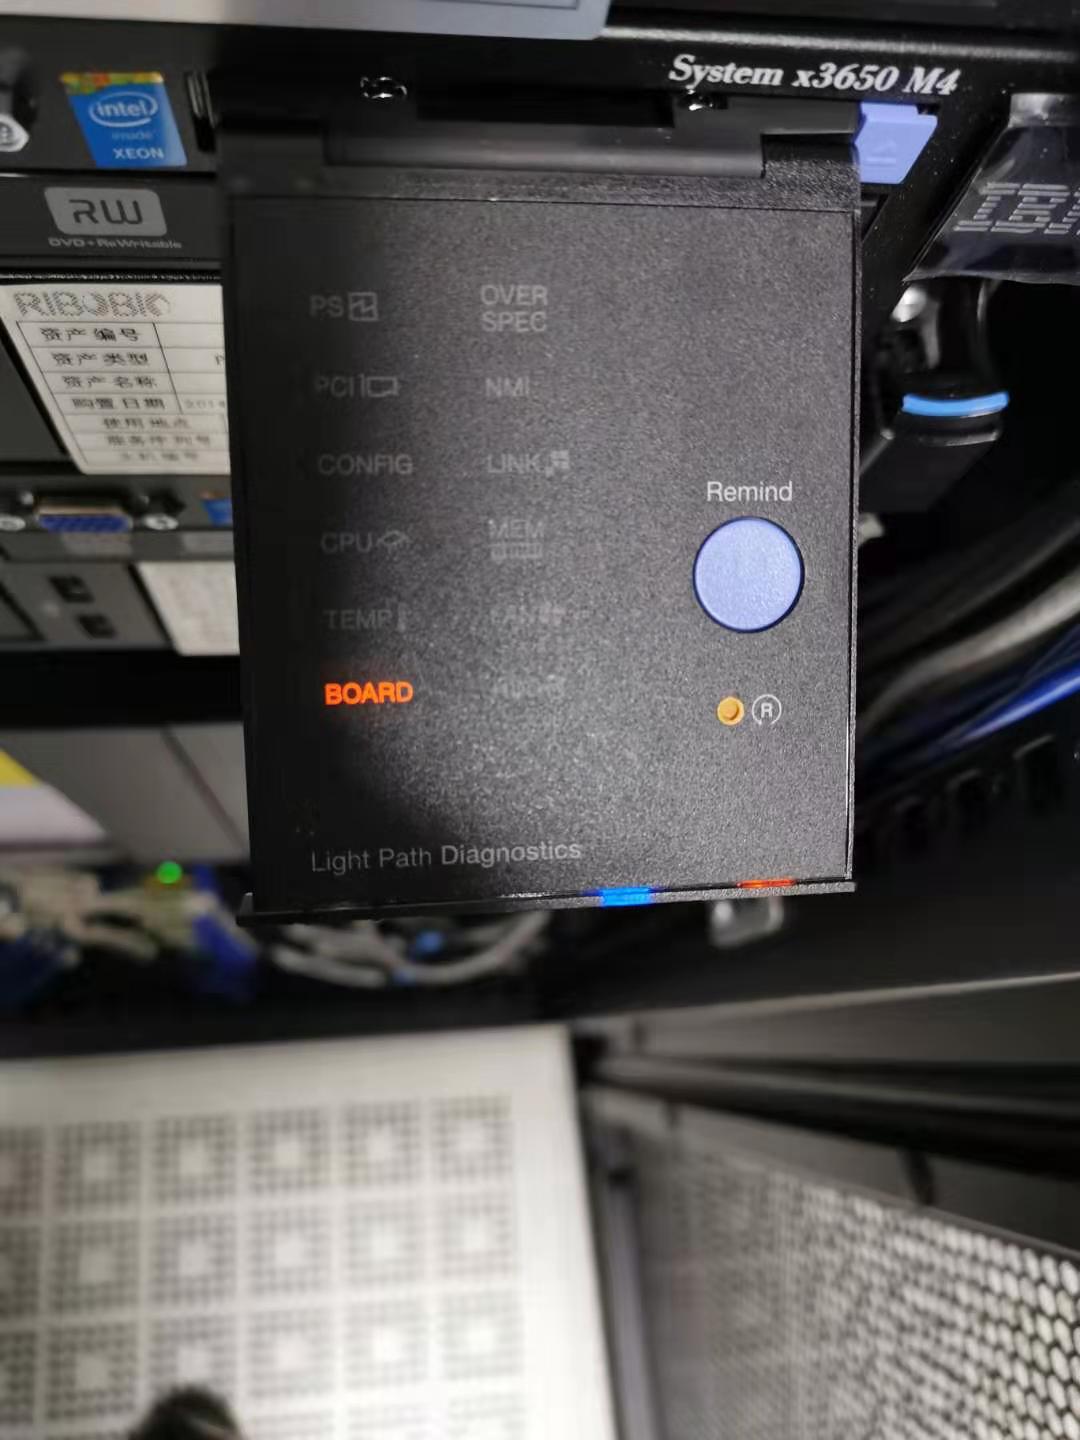
上周日,由于断电导致公司所在的集群服务器在关机断电重启后,发现唯一的一个登陆节点主板出现了故障,以致于 log 节点的 Red Hat Enterprise 6 系统无法启动。
由于集群是生信所有分析工作的基础,我们所用的 IBM LSF 集群一共又 30 多个计算节点,其中还包括了 2 个大内存 fat 节点,log 节点挂掉后,整个生信部门几十号人的工作都没法正常进行,情况可谓是非常紧迫。负责硬件的同时在加班加点联系供应商更换主板后,终于可以把系统启动起来,但是问题也来了:
- 系统启动后一直提示 “Network is unreachable” 错误,log 无法跟计算、管理、存储等节点进行网络连接!
- 供应商负责硬件更换后就走人了,系统层面各种服务还是需要自己去解决。
这个文章主要参考散尽浮华(高级 Linux 运维工程师)在博客园的相关文章,对 Linux 服务器更换主板后,网卡识别失败的处理进行一下记录与分享,以作备忘。
1. 识别不到网卡设备
公司 IDC 机房里的一台线上服务器硬件报警,最后排查发现服务器主板坏了,随即联系厂商进行更换主板,最后更换后,登录服务器,发现网卡绑定及 ip 信息都在,但是 ip 却 ping 不通了,进一步排查,重启网卡,提示之前的 eth0 和 eth1 网卡设备发现不了了,也就是说服务器主板更换后,之前的网卡设备都识别不了了!
主板更换后,重启并登陆服务器,发现之前的网卡设备(eth0、eth1、eth2、eth3)都没有了!
[root@kevin01 ~]# ifconfig -a
bond0     Link encap:Ethernet  HWaddr 08:94:EF:5E:AE:72
          inet addr:192.168.10.20  Bcast:192.168.10.255  Mask:255.255.255.0
          inet6 addr: fe80::a94:efff:fe5e:ae72/64 Scope:Link
          UP BROADCAST RUNNING MASTER MULTICAST  MTU:1500  Metric:1
          RX packets:75582 errors:0 dropped:0 overruns:0 frame:0
          TX packets:58537 errors:0 dropped:0 overruns:0 carrier:0
          collisions:0 txqueuelen:0
          RX bytes:5890233 (5.6 MiB)  TX bytes:4390537 (4.1 MiB)

lo        Link encap:Local Loopback
          inet addr:127.0.0.1  Mask:255.0.0.0
          inet6 addr: ::1/128 Scope:Host
          UP LOOPBACK RUNNING  MTU:65536  Metric:1
          RX packets:26 errors:0 dropped:0 overruns:0 frame:0
          TX packets:26 errors:0 dropped:0 overruns:0 carrier:0
          collisions:0 txqueuelen:0
          RX bytes:1983 (1.9 KiB)  TX bytes:1983 (1.9 KiB)

usb0      Link encap:Ethernet  HWaddr 0A:94:EF:5E:AE:79
          BROADCAST MULTICAST  MTU:1500  Metric:1
          RX packets:0 errors:0 dropped:0 overruns:0 frame:0
          TX packets:0 errors:0 dropped:0 overruns:0 carrier:0
          collisions:0 txqueuelen:1000
          RX bytes:0 (0.0 b)  TX bytes:0 (0.0 b)
之前的网卡设备和 bond 绑定的配置信息都还在(bond 绑定网卡操作:《Linux 下绑定网卡的操作记录》)。
[root@kevin ~]# cd /etc/sysconfig/network-scripts/
[root@kevin network-scripts]# ls
ifcfg-bond0  ifcfg-lo     ifdown-ib    ifdown-ppp     ifup-aliases  ifup-ipv6   ifup-ppp       init.ipv6-global
ifcfg-eth0   ifcfg-usb0   ifdown-ippp  ifdown-routes  ifup-bnep     ifup-isdn   ifup-routes    net.hotplug
ifcfg-eth1   ifdown       ifdown-ipv6  ifdown-sit     ifup-eth      ifup-plip   ifup-sit       network-functions
ifcfg-eth2   ifdown-bnep  ifdown-isdn  ifdown-tunnel  ifup-ib       ifup-plusb  ifup-tunnel    network-functions-ipv6
ifcfg-eth3   ifdown-eth   ifdown-post  ifup           ifup-ippp     ifup-post   ifup-wireless

[root@kevin ~]# /etc/init.d/network restart
......
报错说没有发现 eth0 和 eth1 网卡

[root@kevin ~]# ipdown eth0
报错提示说没有发现 eth0 网卡
2. 产生原因
这是因为服务器更换了主板或网卡,MAC 地址改变所导致的。系统加载网卡驱动后会去读一个文件(即 /etc/udev/rules.d/70-persistent-net.rules ),这个文件是一个缓冲文件,包含了网卡的 MAC 地址,因为更换了主板,网卡的 MAC 地址也变了,但是这个文件的 MAC 地址还没变,还是之前坏了的主板的上面的网卡的 MAC 地址,这样系统在加载网卡,读取这个文件的时候读取的是之前网卡的 MAC 地址,和现在更换后主板后的网卡 MAC 地址不一致导致混乱,所以就识别不了当前网卡。
3. 解决方法
一般来说,删除 /etc/udev/rules.d/70-persistent-net.rules 文件(或者把这个文件重新命名 或者清空该文件内容),重启服务器就可以解决了,重启后会重新生成这个文件,这样就顺利解决这个问题了!这里注意下,由于我的这台服务器绑定了网卡,所以重启网卡后,还需要进行 modprobe 命令使得网卡绑定生效,大致步骤如下:
$ mv /etc/udev/rules.d/70-persistent-net.rules /etc/udev/rules.d/70-persistent-net.rules.bak20180307
$ init 6
重启服务器后,查看 /etc/udev/rules.d/70-persistent-net.rules 文件,发现没有 eth0、eth1、eth3、eth4 的网卡信息(mac 和设备名称):
[root@kevin network-scripts]# cat /etc/udev/rules.d/70-persistent-net.rules
# This file was automatically generated by the /lib/udev/write_net_rules
# program, run by the persistent-net-generator.rules rules file.
#
# You can modify it, as long as you keep each rule on a single
# line, and change only the value of the NAME= key.

# PCI device 0x14e4:0x1657 (tg3)
SUBSYSTEM=="net", ACTION=="add", DRIVERS=="?*", ATTR{address}=="****", ATTR{type}=="1", KERNEL=="eth*"

# PCI device 0x14e4:0x1657 (tg3)
SUBSYSTEM=="net", ACTION=="add", DRIVERS=="?*", ATTR{address}=="****", ATTR{type}=="1", KERNEL=="eth*"

# PCI device 0x14e4:0x1657 (tg3)
SUBSYSTEM=="net", ACTION=="add", DRIVERS=="?*", ATTR{address}=="****", ATTR{type}=="1", KERNEL=="eth*"

# PCI device 0x14e4:0x1657 (tg3)
SUBSYSTEM=="net", ACTION=="add", DRIVERS=="?*", ATTR{address}=="****", ATTR{type}=="1", KERNEL=="eth*"
然后重启网卡等操作:
[root@kevin ~]# modprobe bonding
[root@kevin ~]# /etc/init.d/network restart
[root@kevin ~]# modprobe bonding
接着 ifconfig 查看,发现 eth0、eth1、eth2、eth3 网卡设备都能识别了:
[root@kevin ~]# ifconfig -a
bond0     Link encap:Ethernet  HWaddr 08:94:EF:5E:AE:72
          inet addr:192.168.10.20  Bcast:192.168.10.255  Mask:255.255.255.0
          inet6 addr: fe80::a94:efff:fe5e:ae72/64 Scope:Link
          UP BROADCAST RUNNING MASTER MULTICAST  MTU:1500  Metric:1
          RX packets:108809 errors:0 dropped:0 overruns:0 frame:0
          TX packets:84207 errors:0 dropped:0 overruns:0 carrier:0
          collisions:0 txqueuelen:0
          RX bytes:8471111 (8.0 MiB)  TX bytes:6322341 (6.0 MiB)

eth0      Link encap:Ethernet  HWaddr 08:94:EF:5E:AE:72
          UP BROADCAST RUNNING SLAVE MULTICAST  MTU:1500  Metric:1
          RX packets:38051 errors:0 dropped:0 overruns:0 frame:0
          TX packets:14301 errors:0 dropped:0 overruns:0 carrier:0
          collisions:0 txqueuelen:1000
          RX bytes:2869726 (2.7 MiB)  TX bytes:944276 (922.1 KiB)
          Interrupt:16

eth1      Link encap:Ethernet  HWaddr 08:94:EF:5E:AE:72
          UP BROADCAST RUNNING SLAVE MULTICAST  MTU:1500  Metric:1
          RX packets:69158 errors:0 dropped:0 overruns:0 frame:0
          TX packets:68615 errors:0 dropped:0 overruns:0 carrier:0
          collisions:0 txqueuelen:1000
          RX bytes:5469647 (5.2 MiB)  TX bytes:5279012 (5.0 MiB)
          Interrupt:17

eth2      Link encap:Ethernet  HWaddr 08:94:EF:5E:AE:74
          BROADCAST MULTICAST  MTU:1500  Metric:1
          RX packets:0 errors:0 dropped:0 overruns:0 frame:0
          TX packets:0 errors:0 dropped:0 overruns:0 carrier:0
          collisions:0 txqueuelen:1000
          RX bytes:0 (0.0 b)  TX bytes:0 (0.0 b)
          Interrupt:16

eth3      Link encap:Ethernet  HWaddr 08:94:EF:5E:AE:75
          BROADCAST MULTICAST  MTU:1500  Metric:1
          RX packets:0 errors:0 dropped:0 overruns:0 frame:0
          TX packets:0 errors:0 dropped:0 overruns:0 carrier:0
          collisions:0 txqueuelen:1000
          RX bytes:0 (0.0 b)  TX bytes:0 (0.0 b)
          Interrupt:17

lo        Link encap:Local Loopback
          inet addr:127.0.0.1  Mask:255.0.0.0
          inet6 addr: ::1/128 Scope:Host
          UP LOOPBACK RUNNING  MTU:65536  Metric:1
          RX packets:26 errors:0 dropped:0 overruns:0 frame:0
          TX packets:26 errors:0 dropped:0 overruns:0 carrier:0
          collisions:0 txqueuelen:0
          RX bytes:1983 (1.9 KiB)  TX bytes:1983 (1.9 KiB)

usb0      Link encap:Ethernet  HWaddr 0A:94:EF:5E:AE:79
          BROADCAST MULTICAST  MTU:1500  Metric:1
          RX packets:0 errors:0 dropped:0 overruns:0 frame:0
          TX packets:0 errors:0 dropped:0 overruns:0 carrier:0
          collisions:0 txqueuelen:1000
          RX bytes:0 (0.0 b)  TX bytes:0 (0.0 b)
在查看 /etc/udev/rules.d/70-persistent-net.rules 文件,发现 eth0、eth1、eth2、eth3 网卡及其 mac 地址信息都有了:
[root@kevin ~]# cat /etc/udev/rules.d/70-persistent-net.rules
# This file was automatically generated by the /lib/udev/write_net_rules
# program, run by the persistent-net-generator.rules rules file.
#
# You can modify it, as long as you keep each rule on a single
# line, and change only the value of the NAME= key.

# PCI device 0x14e4:0x1657 (tg3)
SUBSYSTEM=="net", ACTION=="add", DRIVERS=="?*", ATTR{address}=="08:94:ef:5e:ae:75", ATTR{type}=="1", KERNEL=="eth*", NAME="eth3"

# PCI device 0x14e4:0x1657 (tg3)
SUBSYSTEM=="net", ACTION=="add", DRIVERS=="?*", ATTR{address}=="08:94:ef:5e:ae:72", ATTR{type}=="1", KERNEL=="eth*", NAME="eth0"

# PCI device 0x14e4:0x1657 (tg3)
SUBSYSTEM=="net", ACTION=="add", DRIVERS=="?*", ATTR{address}=="08:94:ef:5e:ae:73", ATTR{type}=="1", KERNEL=="eth*", NAME="eth1"

# PCI device 0x14e4:0x1657 (tg3)
SUBSYSTEM=="net", ACTION=="add", DRIVERS=="?*", ATTR{address}=="08:94:ef:5e:ae:74", ATTR{type}=="1", KERNEL=="eth*", NAME="eth2"
接着尝试 ping 其他机器:
[root@kevin ~]# ping 192.168.10.23
PING 192.168.10.23 (192.168.10.23) 56(84) bytes of data.
64 bytes from 192.168.10.23: icmp_seq=1 ttl=64 time=0.030 ms
64 bytes from 192.168.10.23: icmp_seq=2 ttl=64 time=0.016 ms
64 bytes from 192.168.10.23: icmp_seq=3 ttl=64 time=0.016 ms
如果 ping 不通的话,多执行下面命令:
[root@kevin ~]# modprobe bonding
温馨提示
有时候重启后还是出现以上情况,对比之前的 /etc/udev/rules.d/70-persistent-net.rules 文件,新的文件 mac 地址和 name 已经改变,name=eth0 和之前 name=em1 的名字不同!
4. 后话
如果你的服务器有 4 个网卡,重启后对比之前的 /etc/udev/rules.d/70-persistent-net.rules 文件,发现新文件 mac 地址和 name 已经改变,但 name 变成了 name=eth4,name=eth5,name=eth6,name=eth7,这也是正常的。使用 ifconfig -a 命令也是同样的道理。
此外,如果你在 /etc/sysconfig/network-scripts/ 中分别使用 ifcfg-eth0、ifcfg-eth1、ifcfg-eth2、ifcfg-eth3 对四个网卡进行 IP、网关等做了绑定,你需要:
- 分别把这四个文件名改为 ifcfg-eth4、ifcfg-eth5、ifcfg-eth6、ifcfg-eth7,并把其中的 MAC 地址 (HWADDR) 改为对应的新 MAC 地址;
- 或者,把
/etc/udev/rules.d/70-persistent-net.rules文件中的 name 分别改成 name=eth0,name=eth1,name=eth2,name=eth3,同时修改 ifcfg-eth0、ifcfg-eth1、ifcfg-eth2、ifcfg-eth3 文件中对应的 MAC 地址(HWADDR); - 重启网络服务。
5. 参考资料
- 散尽浮华,《Linux 服务器更换主板后,网卡识别失败的处理方法》,博客园
